WFH? Four Exercises to “Undo” what you “Do” all day
Living through a pandemic has flipped our lives upside down. For those able to work from home (WFH), the kitchen counter, couch or dinning room table have become a makeshift office. Achy muscles can be a result of poor posture, prolonged sitting and faulty workspace ergonomics.
Long before the pandemic, one of the most common reasons people seek physiotherapy, was for postural problems, Long hours hunched over a computer. sitting and typing away. Below, is a checklist to help improve your WFH workspace ergonomics, followed by a few exercises to help reset your posture.
Poor posture and what it does to your spine:
For every 2.5cm of forward head positioning, you are adding approximately 3.5kg of additional load to your neck. That is A LOT! The further your head is pitched forward, the more strain you are applying on your neck, shoulders and upper back muscles. Unfortunately, there are no quick fixes to resolve this issue. However there are a few very simple exercises you can do every day to improve your posture, decrease pain and prevent future injuries.
THE SECRET IS CONSISTENCY. Don’t wait until you are in agony to start these exercises and don’t stop doing them, just because you are feeling better. You still have to brush your teeth every day to prevent cavities - right?! Some of the exercises listed below can easily be done at home or at the office. Patients of mine have set up an hourly timer, notifying them to get up and stretch.
Workspace ergonomics checkup:
Make sure the top of your screen is at eye level.
Shoulders should be down and relaxed while your hands are on the keyboard. If your keyboard is too high and forcing your shoulders to shrug up, adjust your desk height. Once you do that, you might have to re-adjust your monitor to maintain the top of the monitor at eye level. You also might have to adjust the height of your chair.
A wireless keyboard is a great tool to meet the above 2 recommendations.
Elbows should be positioned between 90-120 degrees of flexion.
From a side view, your hip, shoulder, neck and ear should all be in one straight line (aligned one on top of the other).
The stretches listed and described below are to be done with ease. Do NOT stretch and get into your maximum range right away. Stop the stretch at the edge of discomfort. Do not force a position. Instead, allow the muscles to melt like butter into the pose, easing your way into a deeper stretch with your breath.
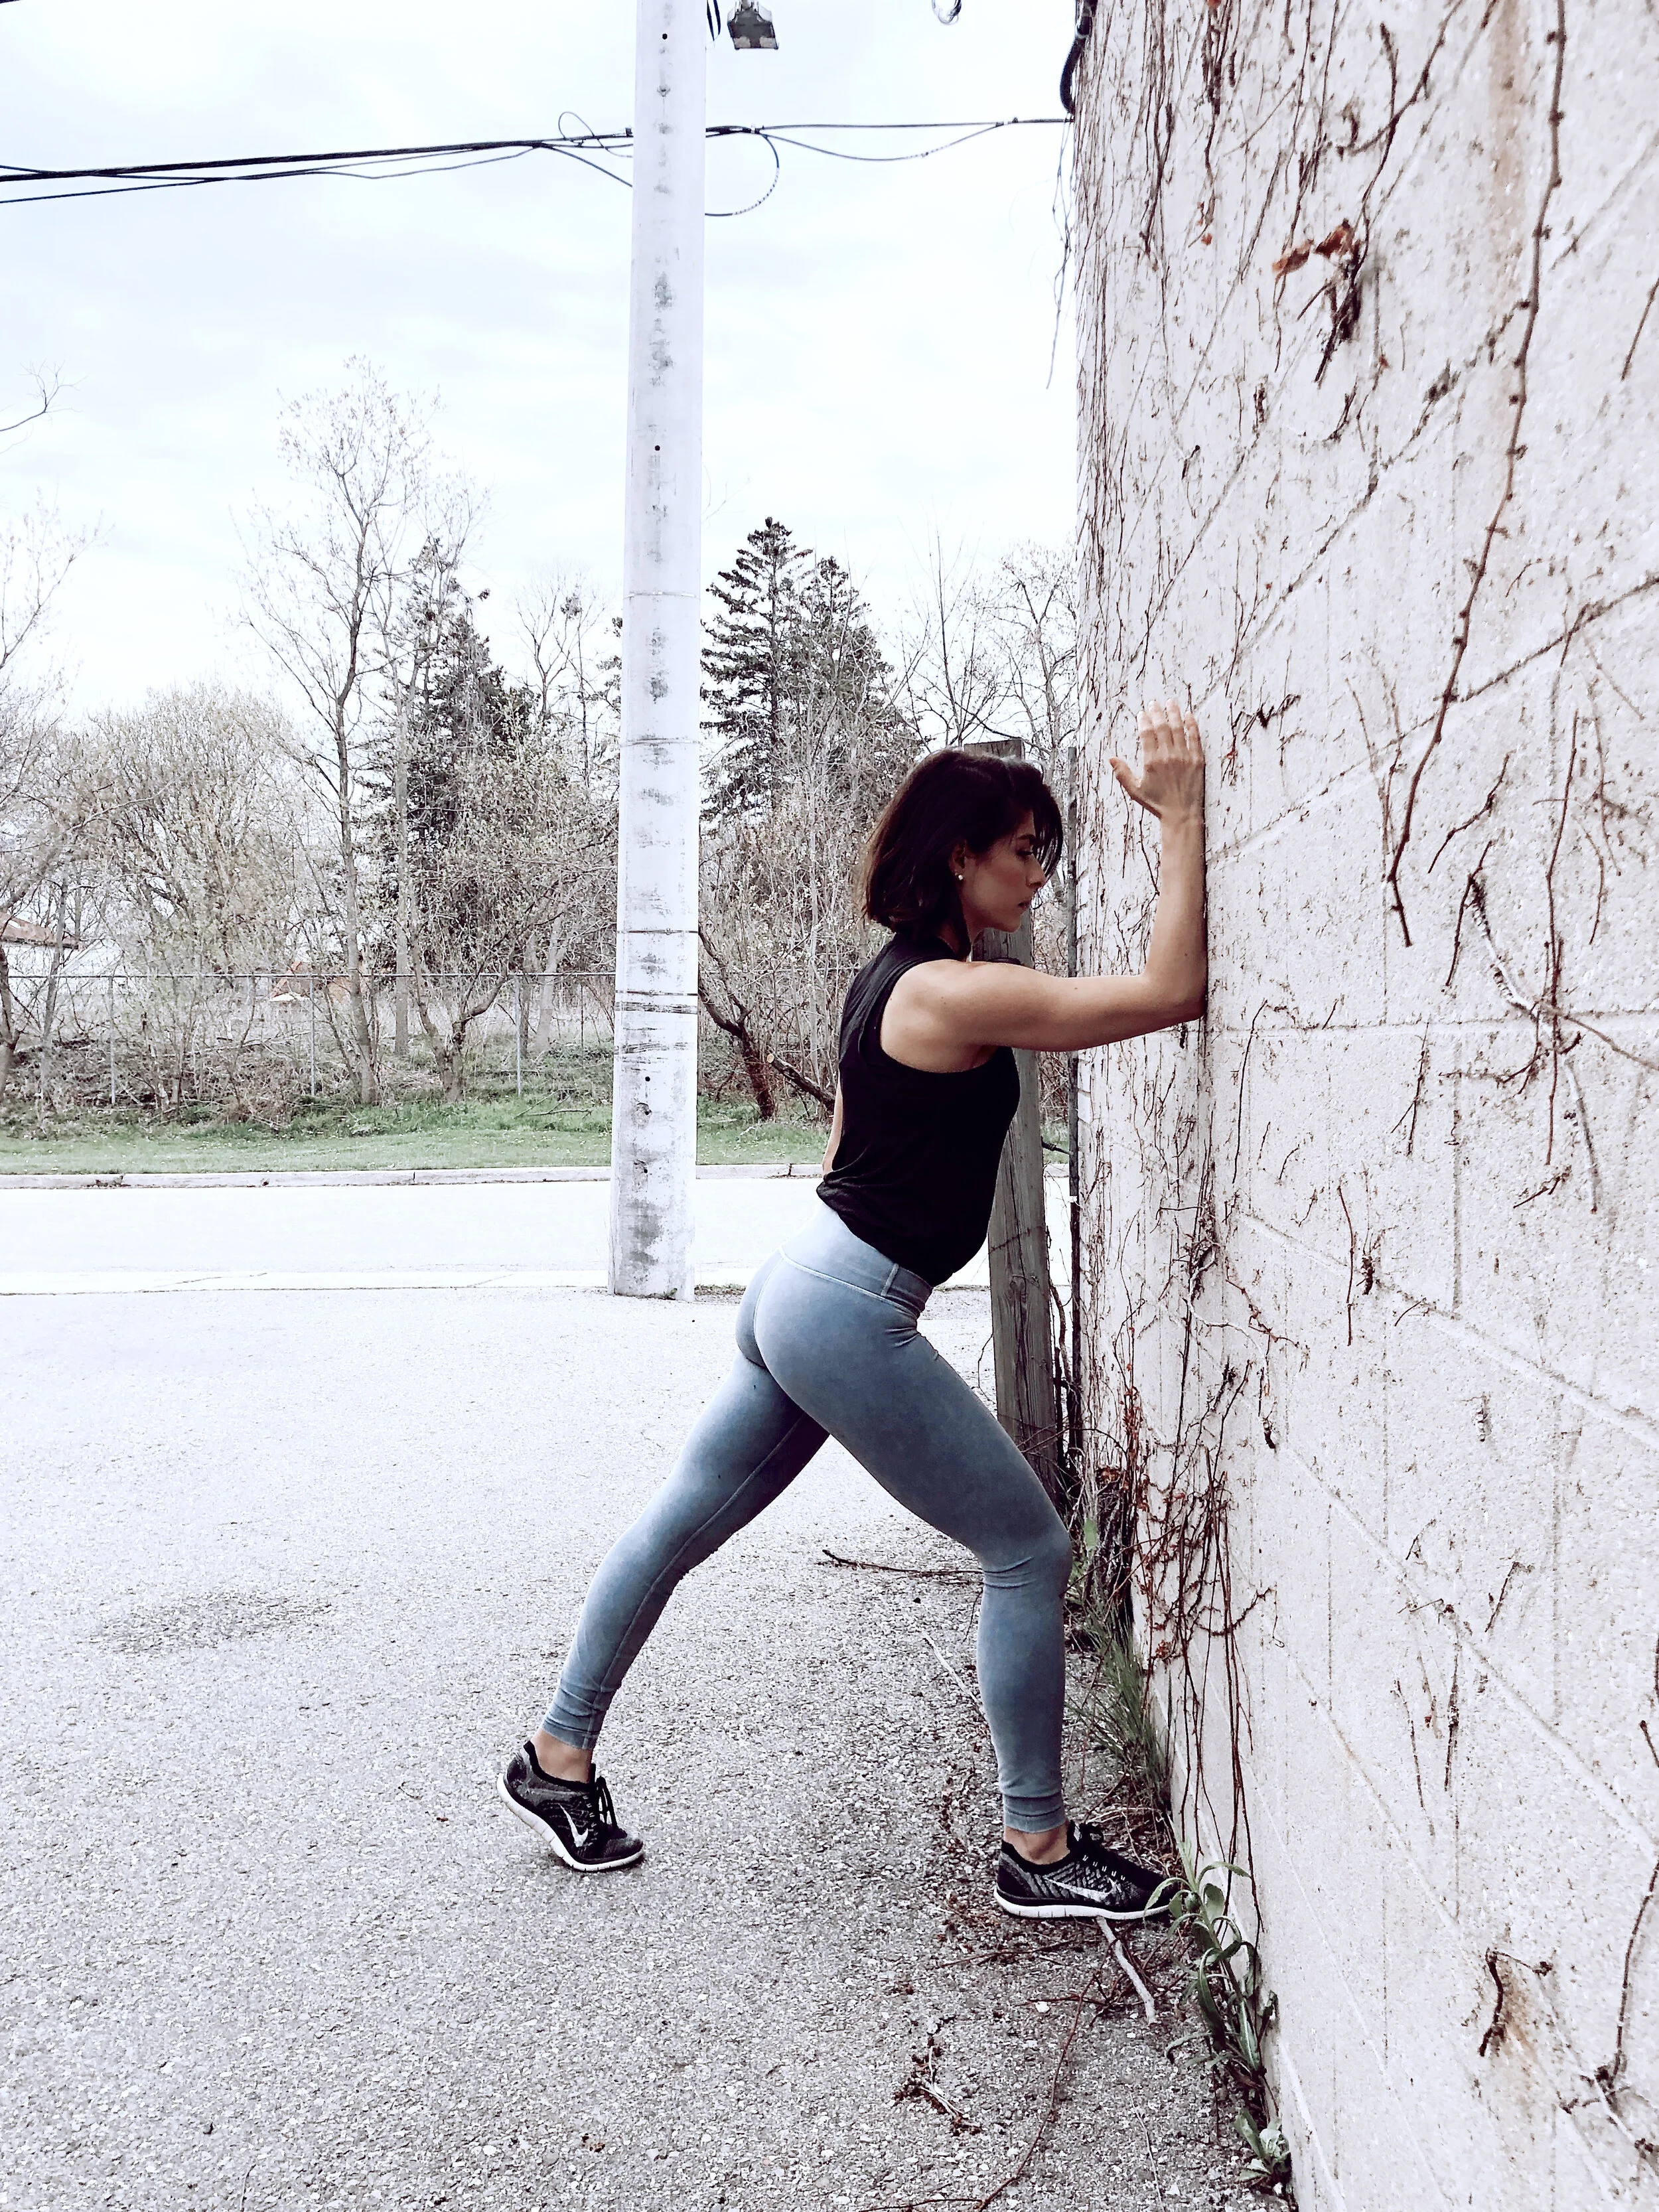
Exercise 1: Dynamic pectoral muscle opener against a wall with a twist
To stretch your right chest, place your right forearm against a wall at 90 degrees.
Stagger your feet in a lunge position, right foot in front, left foot behind (heel lifted)
Twist and pivot your body to the left - you should feel a stretch in your right chest and/or right arm. I also want you to pay attention to the right shoulder blade gliding TOWARDS the spine (retraction). Sitting all day in front of a computer, positions your shoulder blades in a constant PROTRACTED state.
This exercise helps to get your shoulder blade to move and glide freely towards the spine, while stretching the front of your chest.
Hold the twist for 3-5 seconds, repeat 15 times, then switch sides.
You can also hold the stretch for a longer time (about 30 seconds), and repeat 3-4 times on each side.
(tip: keep the shoulder down at all times, do not shrug the shoulder up towards your ear)
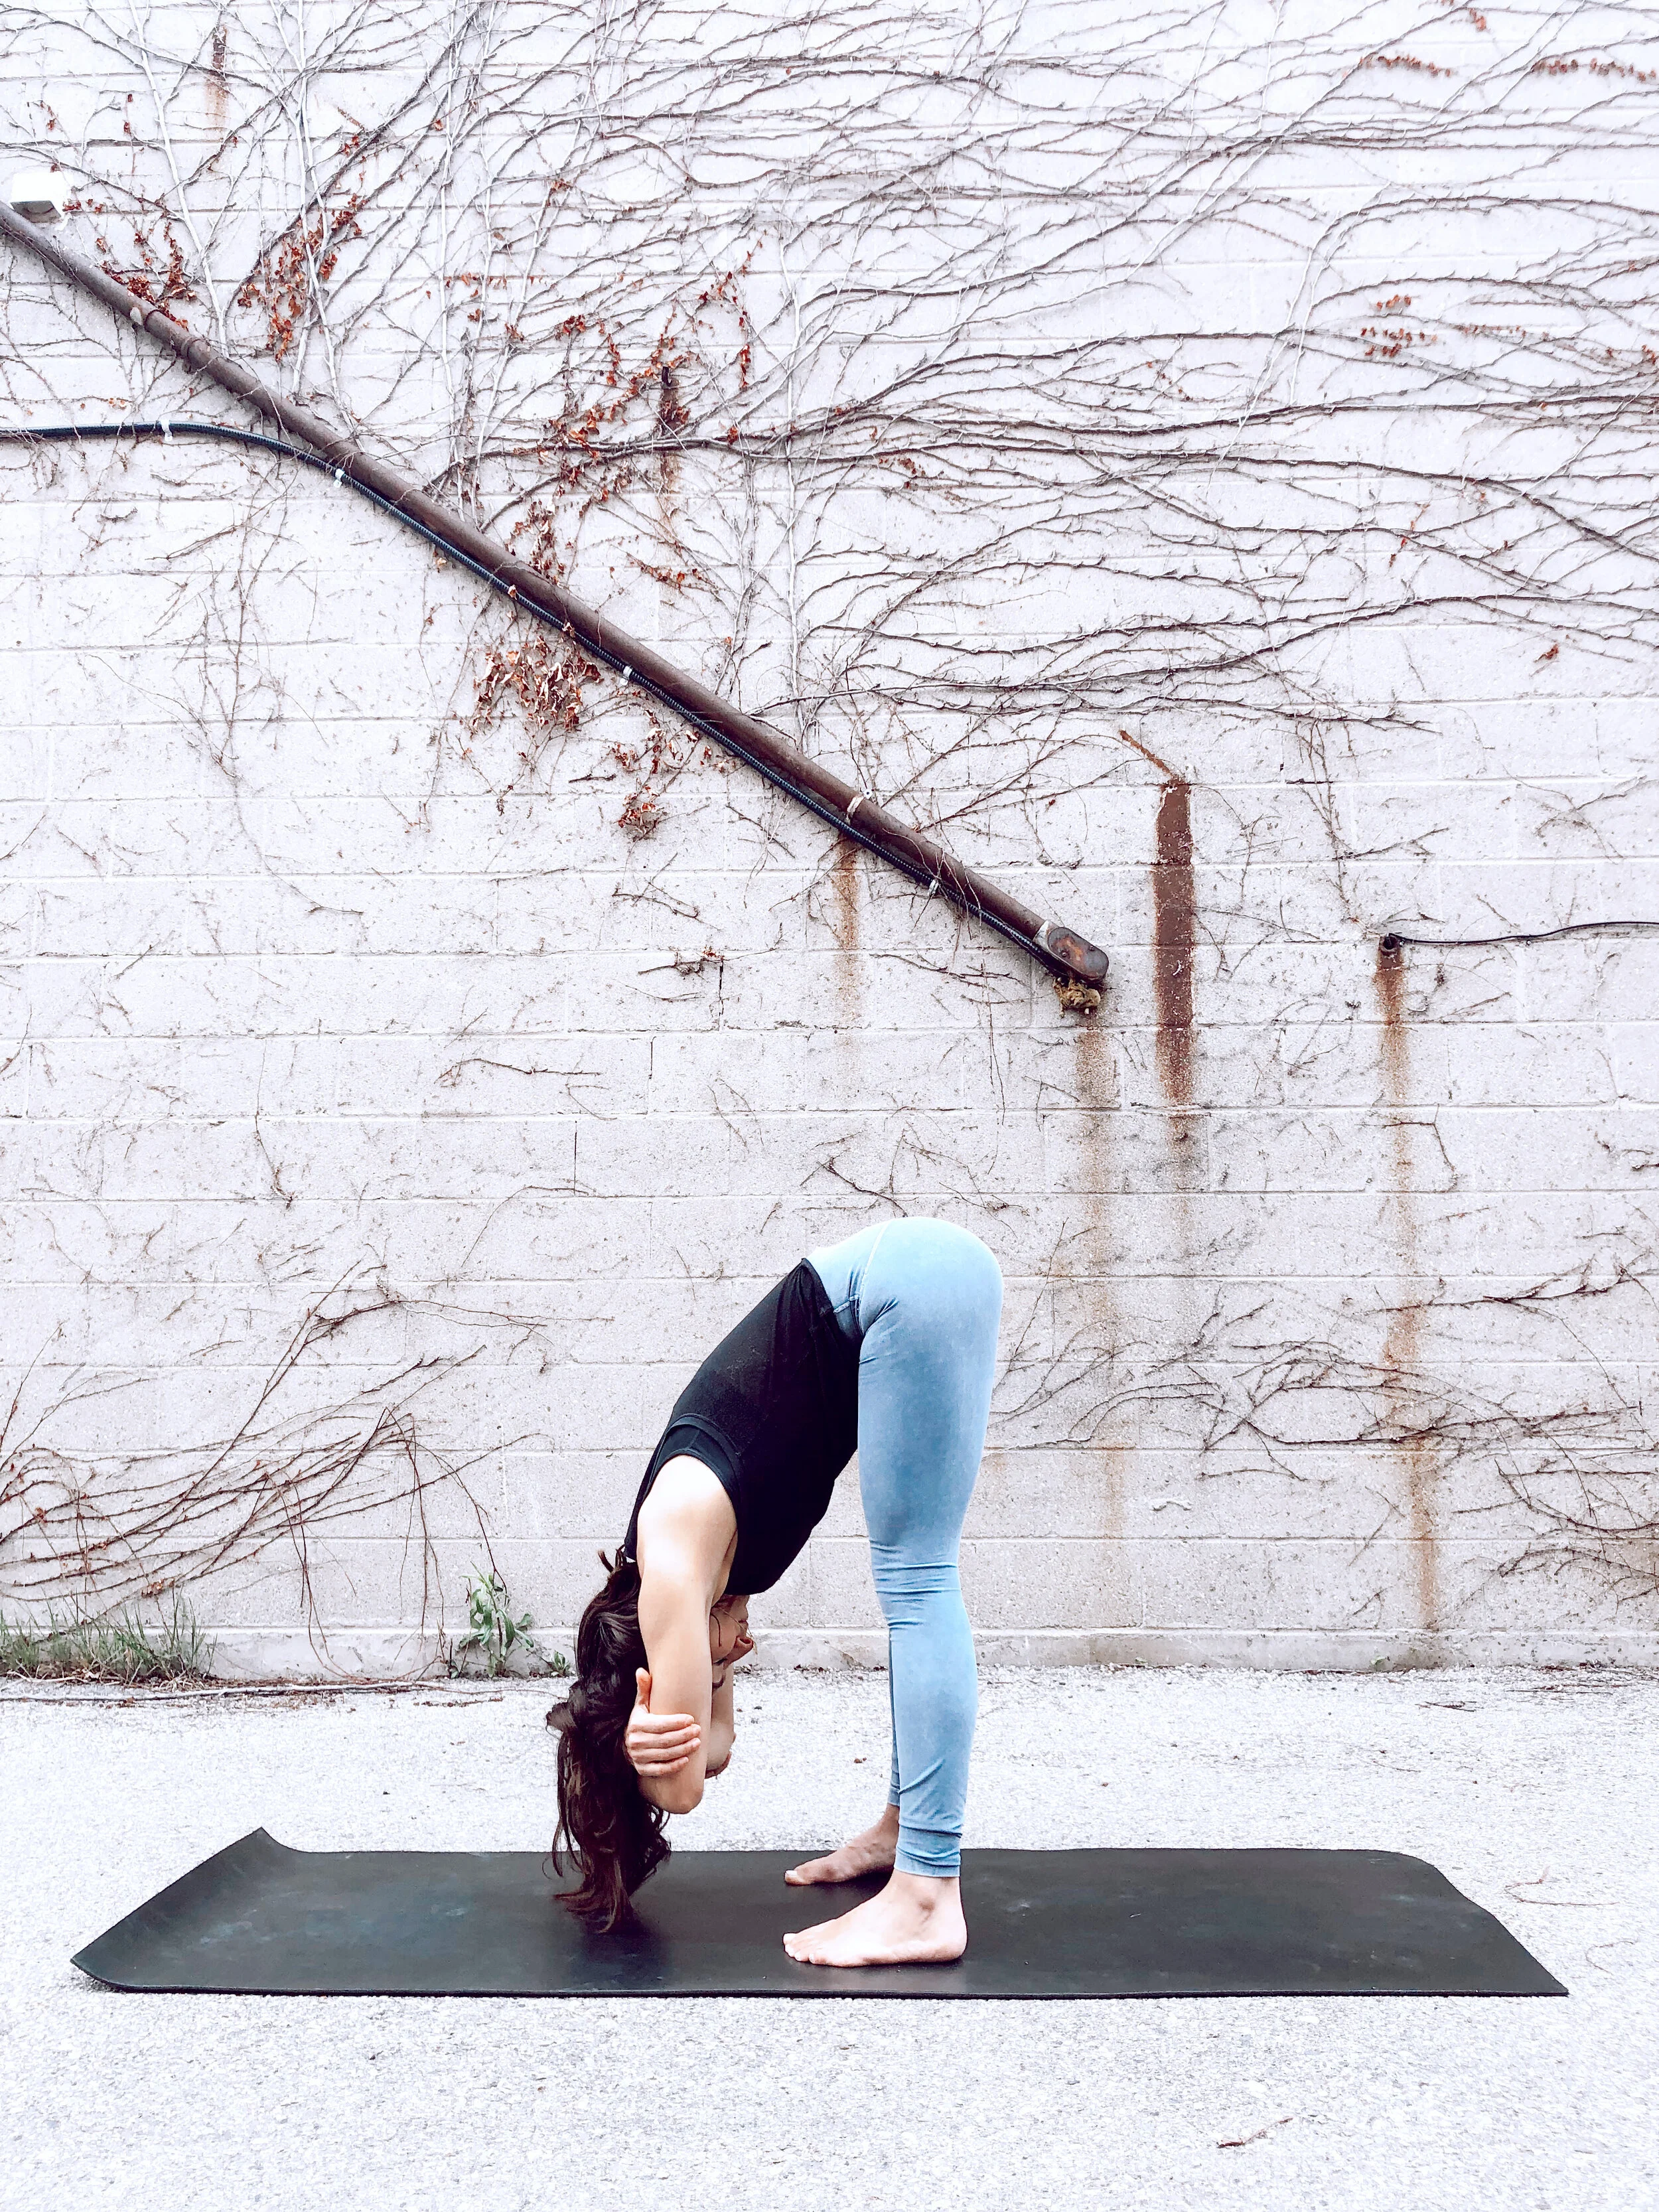
Exercise 2: L shape against the wall - posterior chain stretch
Place your feet hip width distance apart and place your hands against a wall.
Bend forward at the hips.
You can keep a slight bend in your knees especially if you have any nerve pain or tight legs.
Ground your feet firmly into the ground, reach your sit bones back behind you, and gently lift your hips up towards the sky. (These minor adjustments will increase the intensity of the stretch, if needed).
Hold for 1 min, repeat 2-3x in a row. BREATHE and EASE into the stretch
You might feel the stretch in many different areas; such as the calves, hamstrings, glutes, lower and middle back, arms and shoulders.
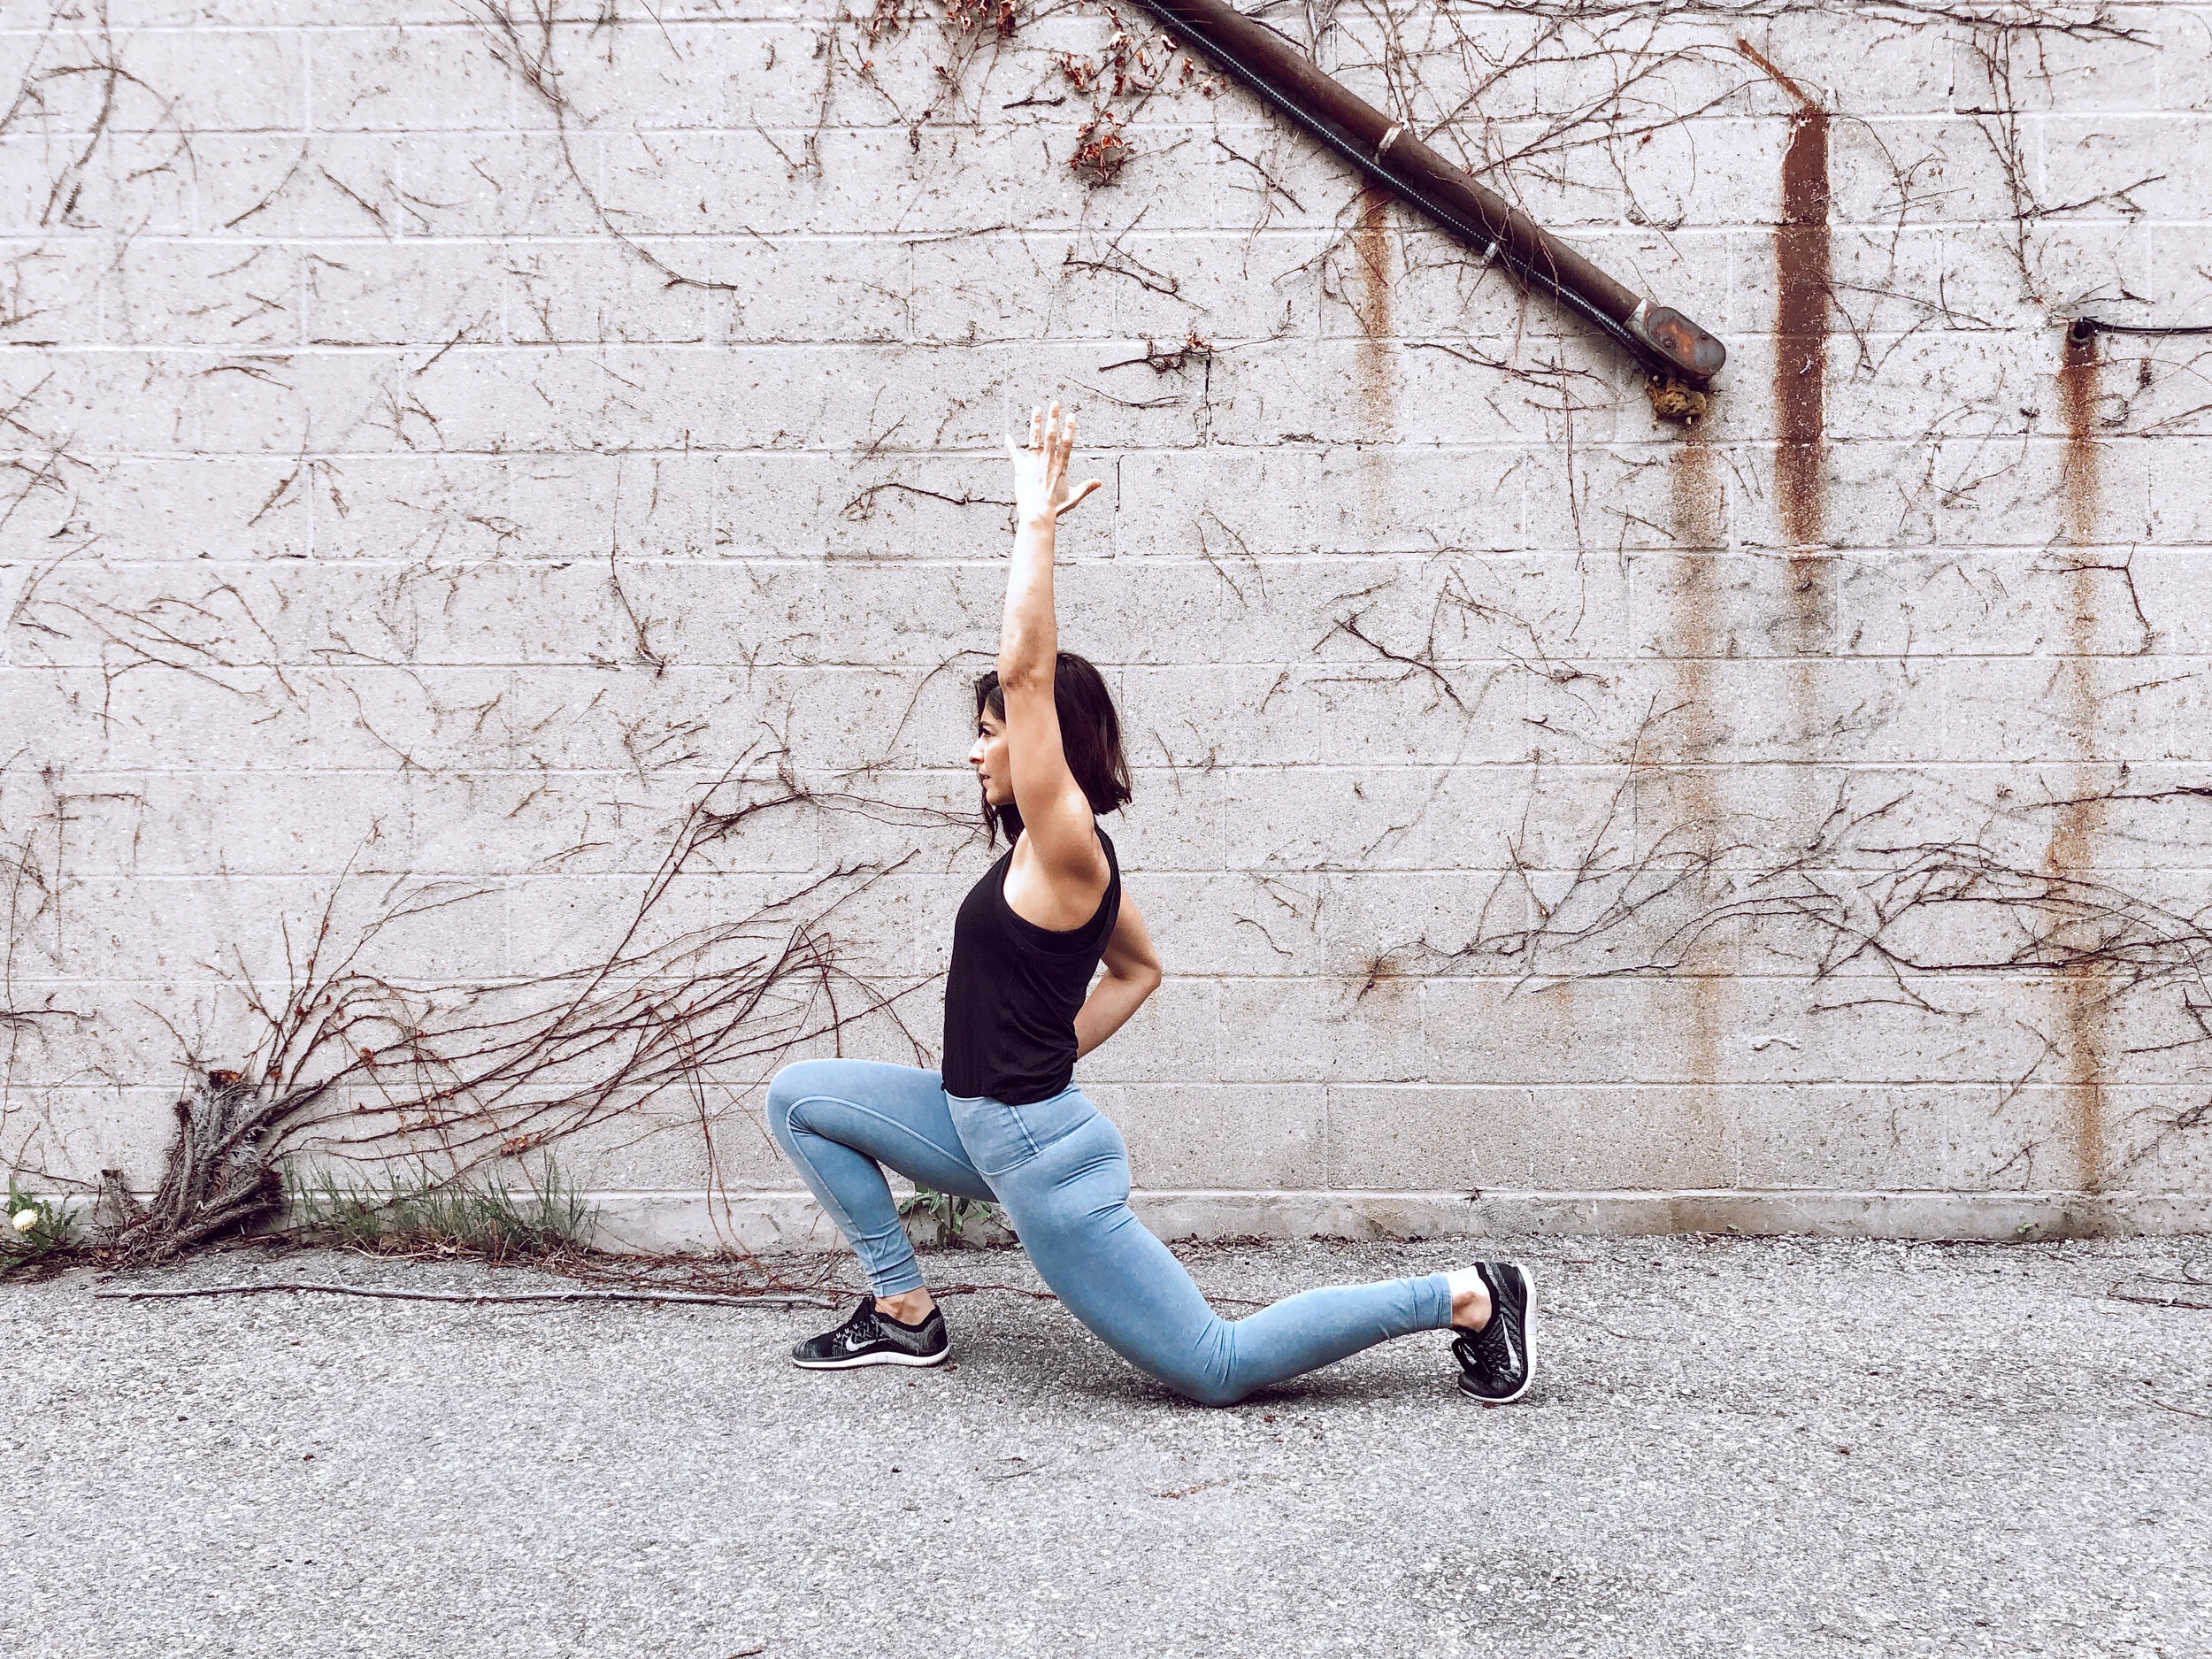
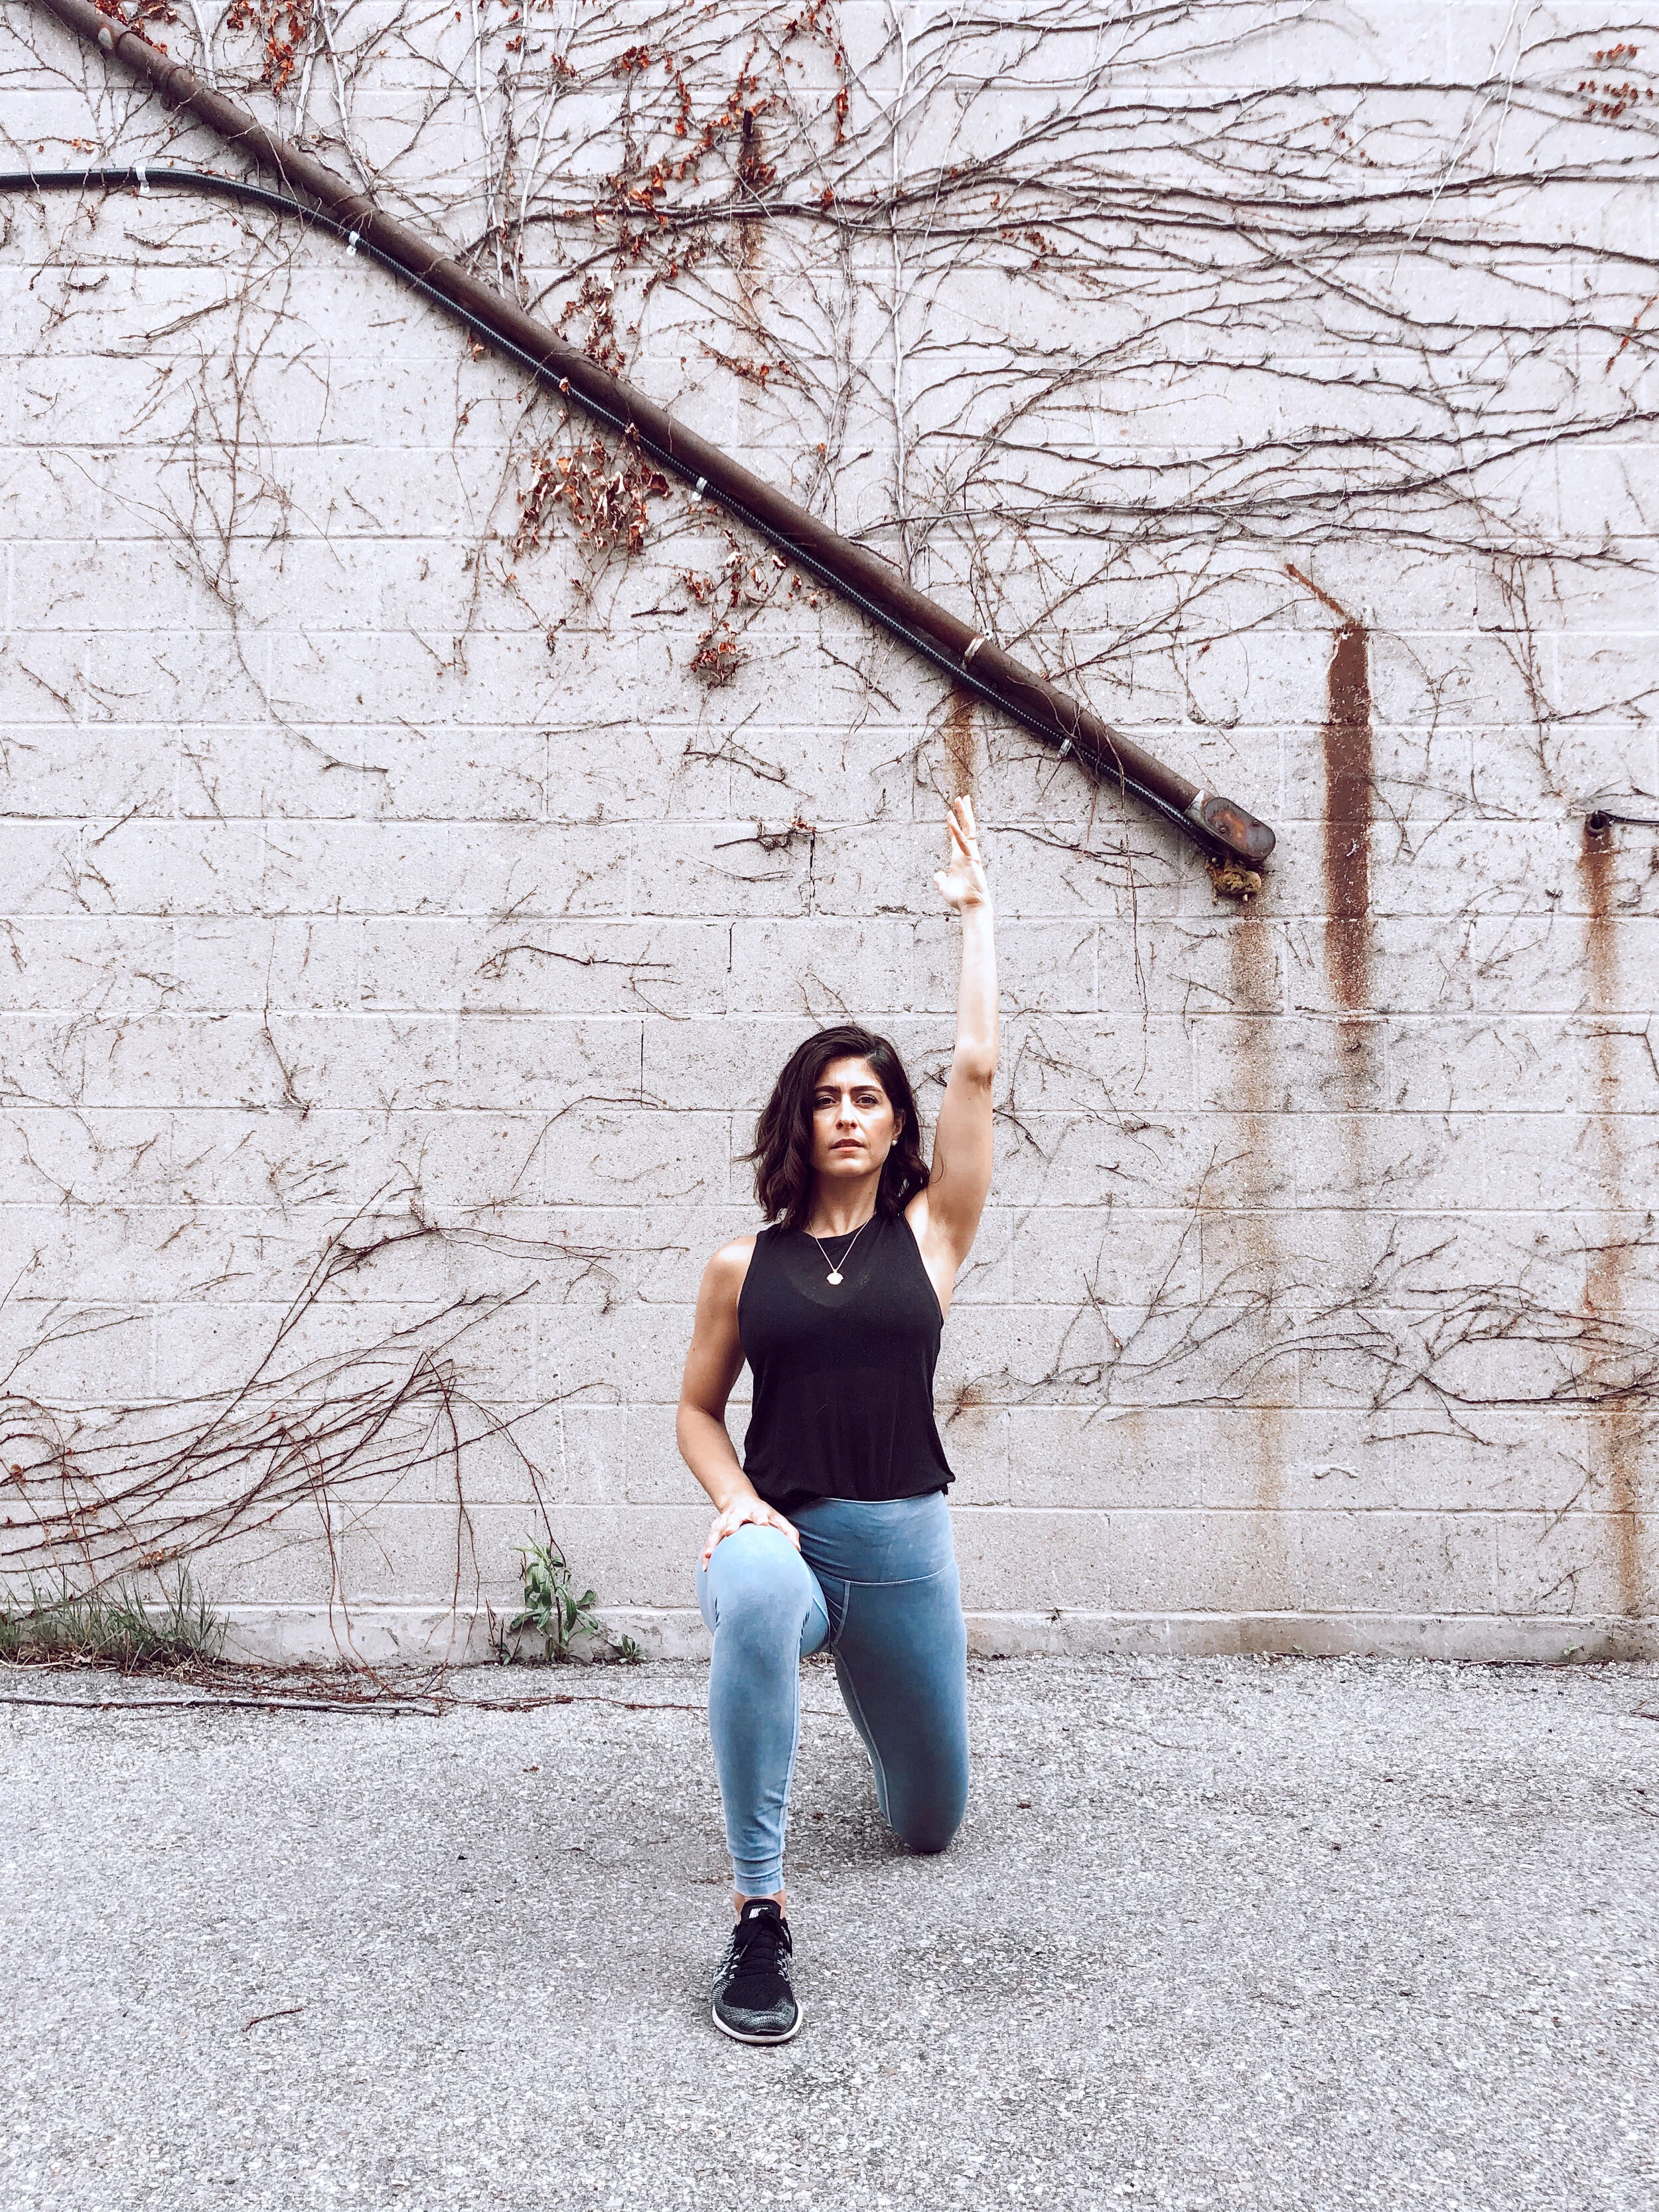
Exercise 3: Lunging hip flexor stretch with arm up “holding a tray”
This exercise can be done in a standing or kneeling position.
To stretch the left hip flexor, place the right foot in front and the left knee on the ground.
Thrust your pelvis (tuck your tailbone in), to maintain a straight lower back.
Get tall and reach your left arm up, while you drive your left knee into the ground.
You can also extend /bend your left wrist, as if you’re holding a tray to target more fascial lines (not shown in picture)
Most people will feel a stretch into the front of the right hip, thigh and even abdomen. If you do not feel a stretch, lunge slowly into the right leg without arching the lower back.
Hold for 30 seconds to 1 minute, repeat 3x each side. Breathe into the stretch to amplify the sensation.
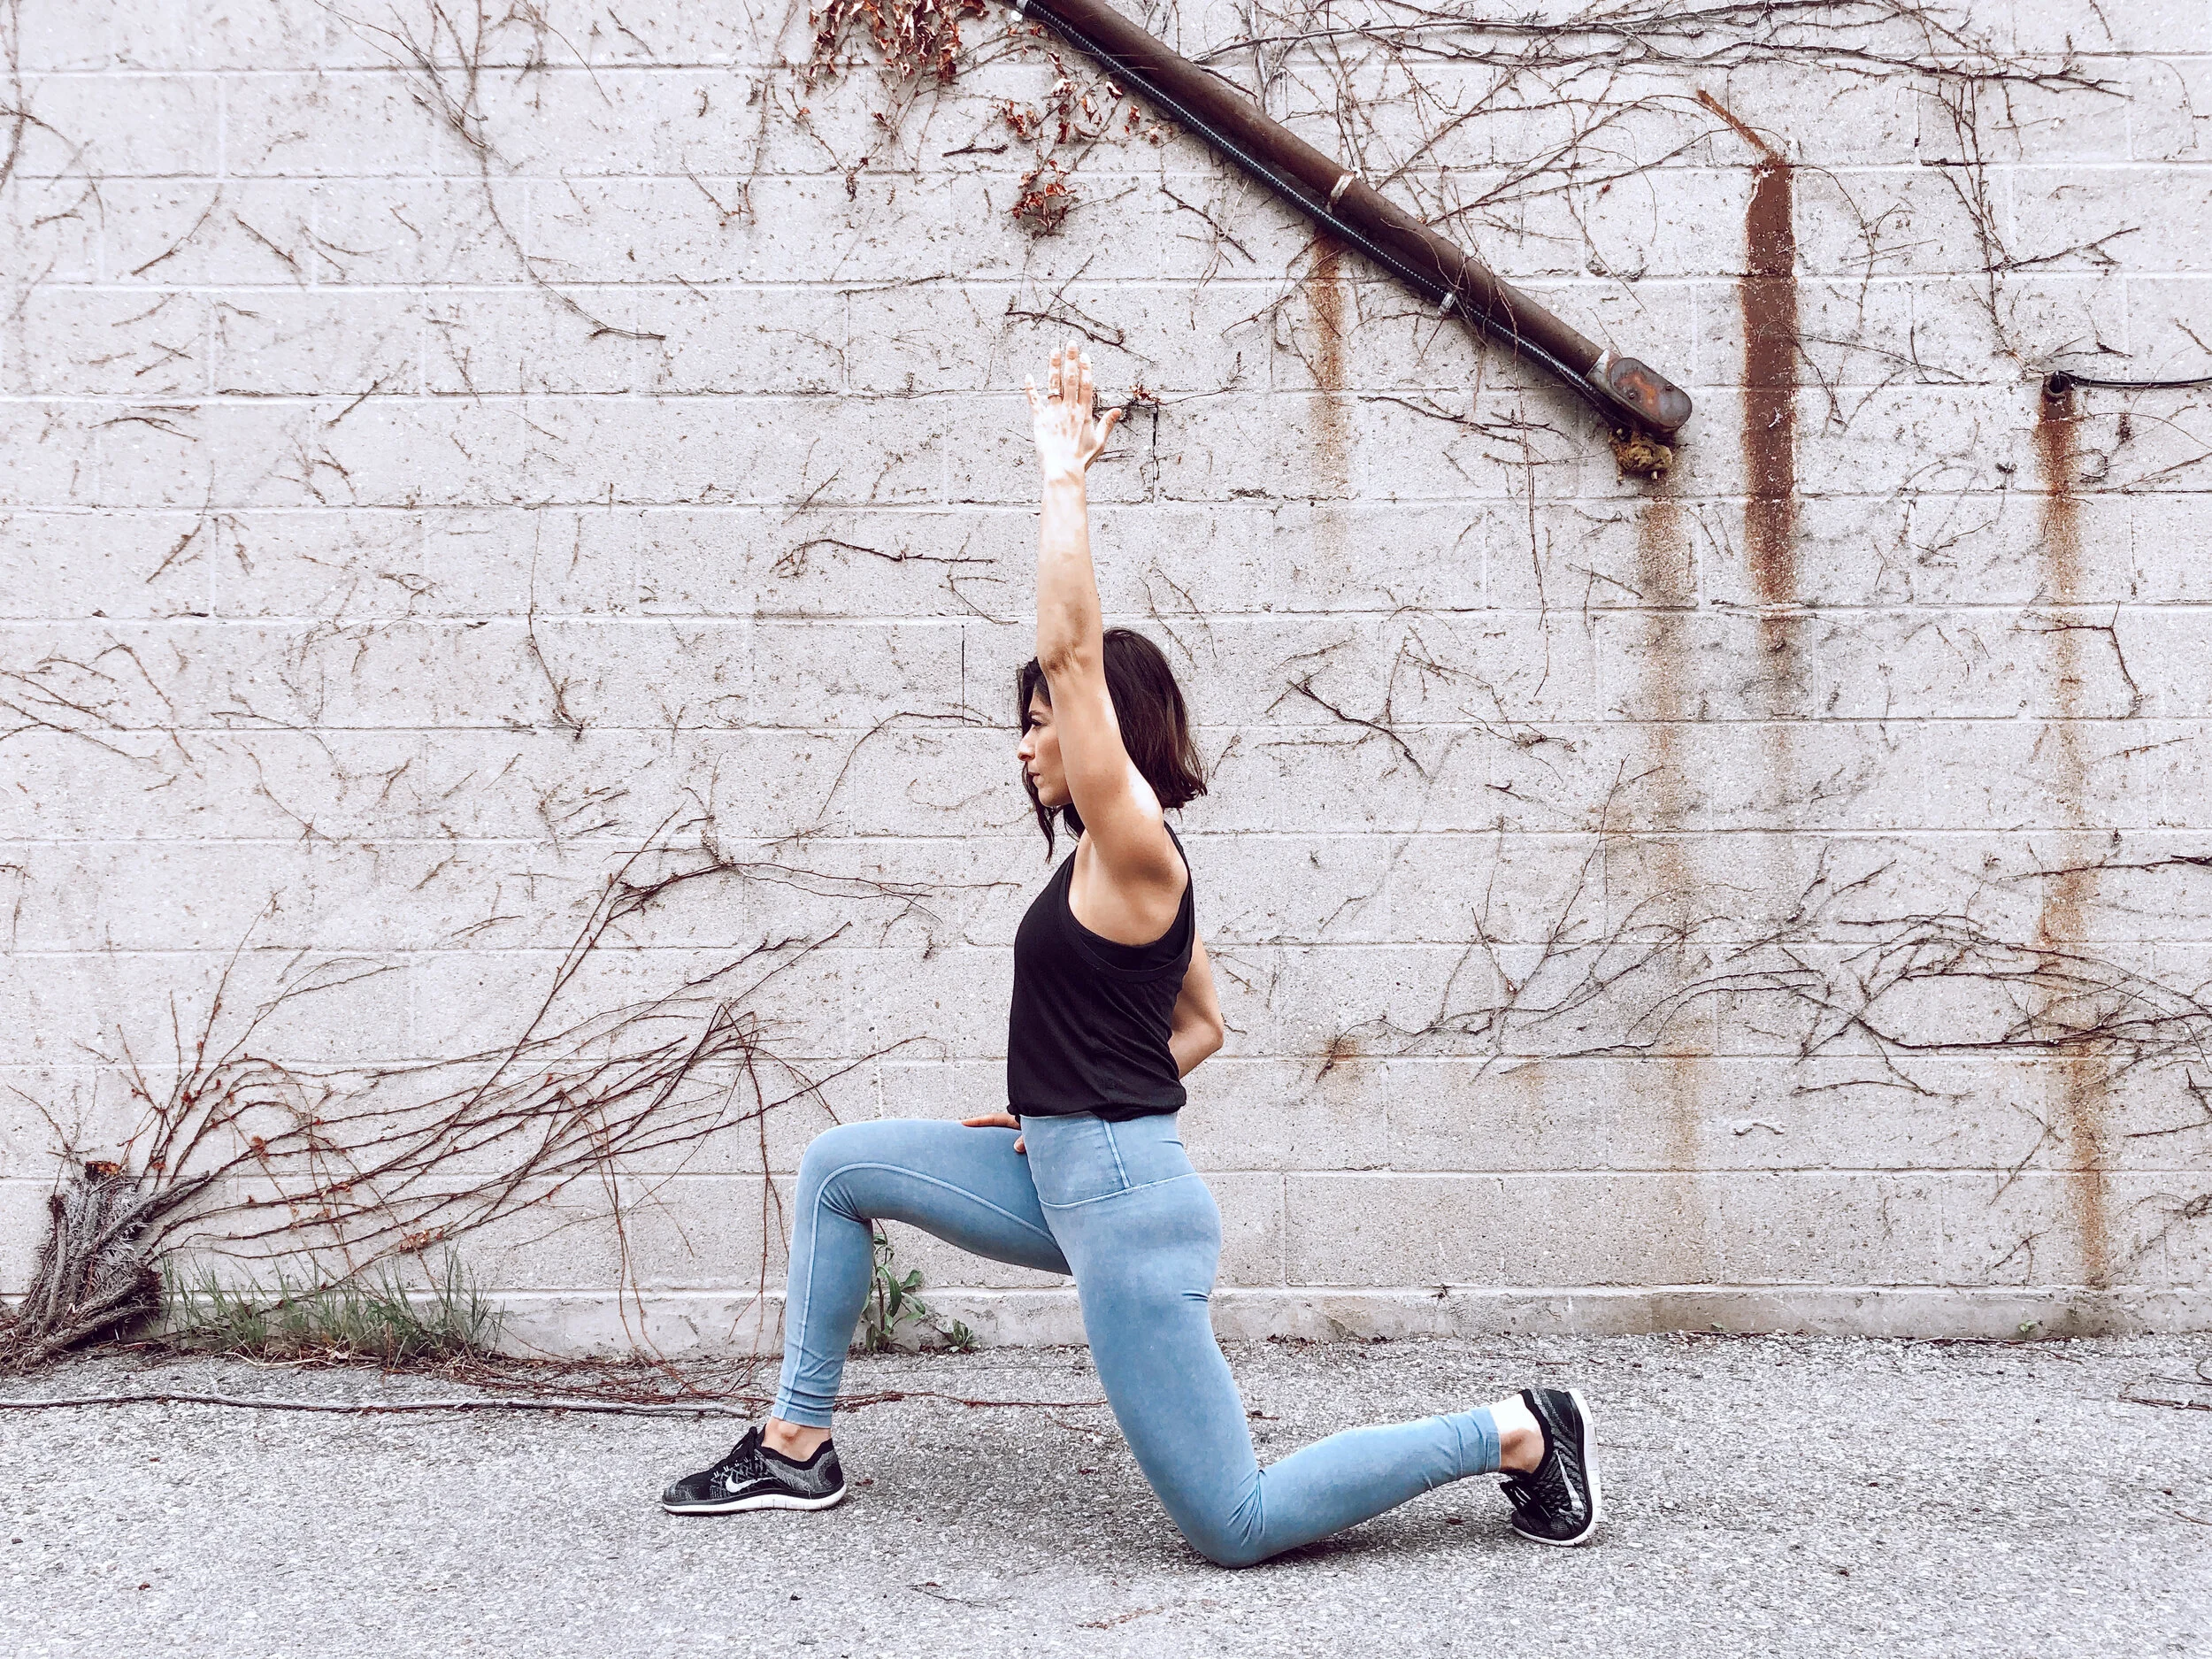
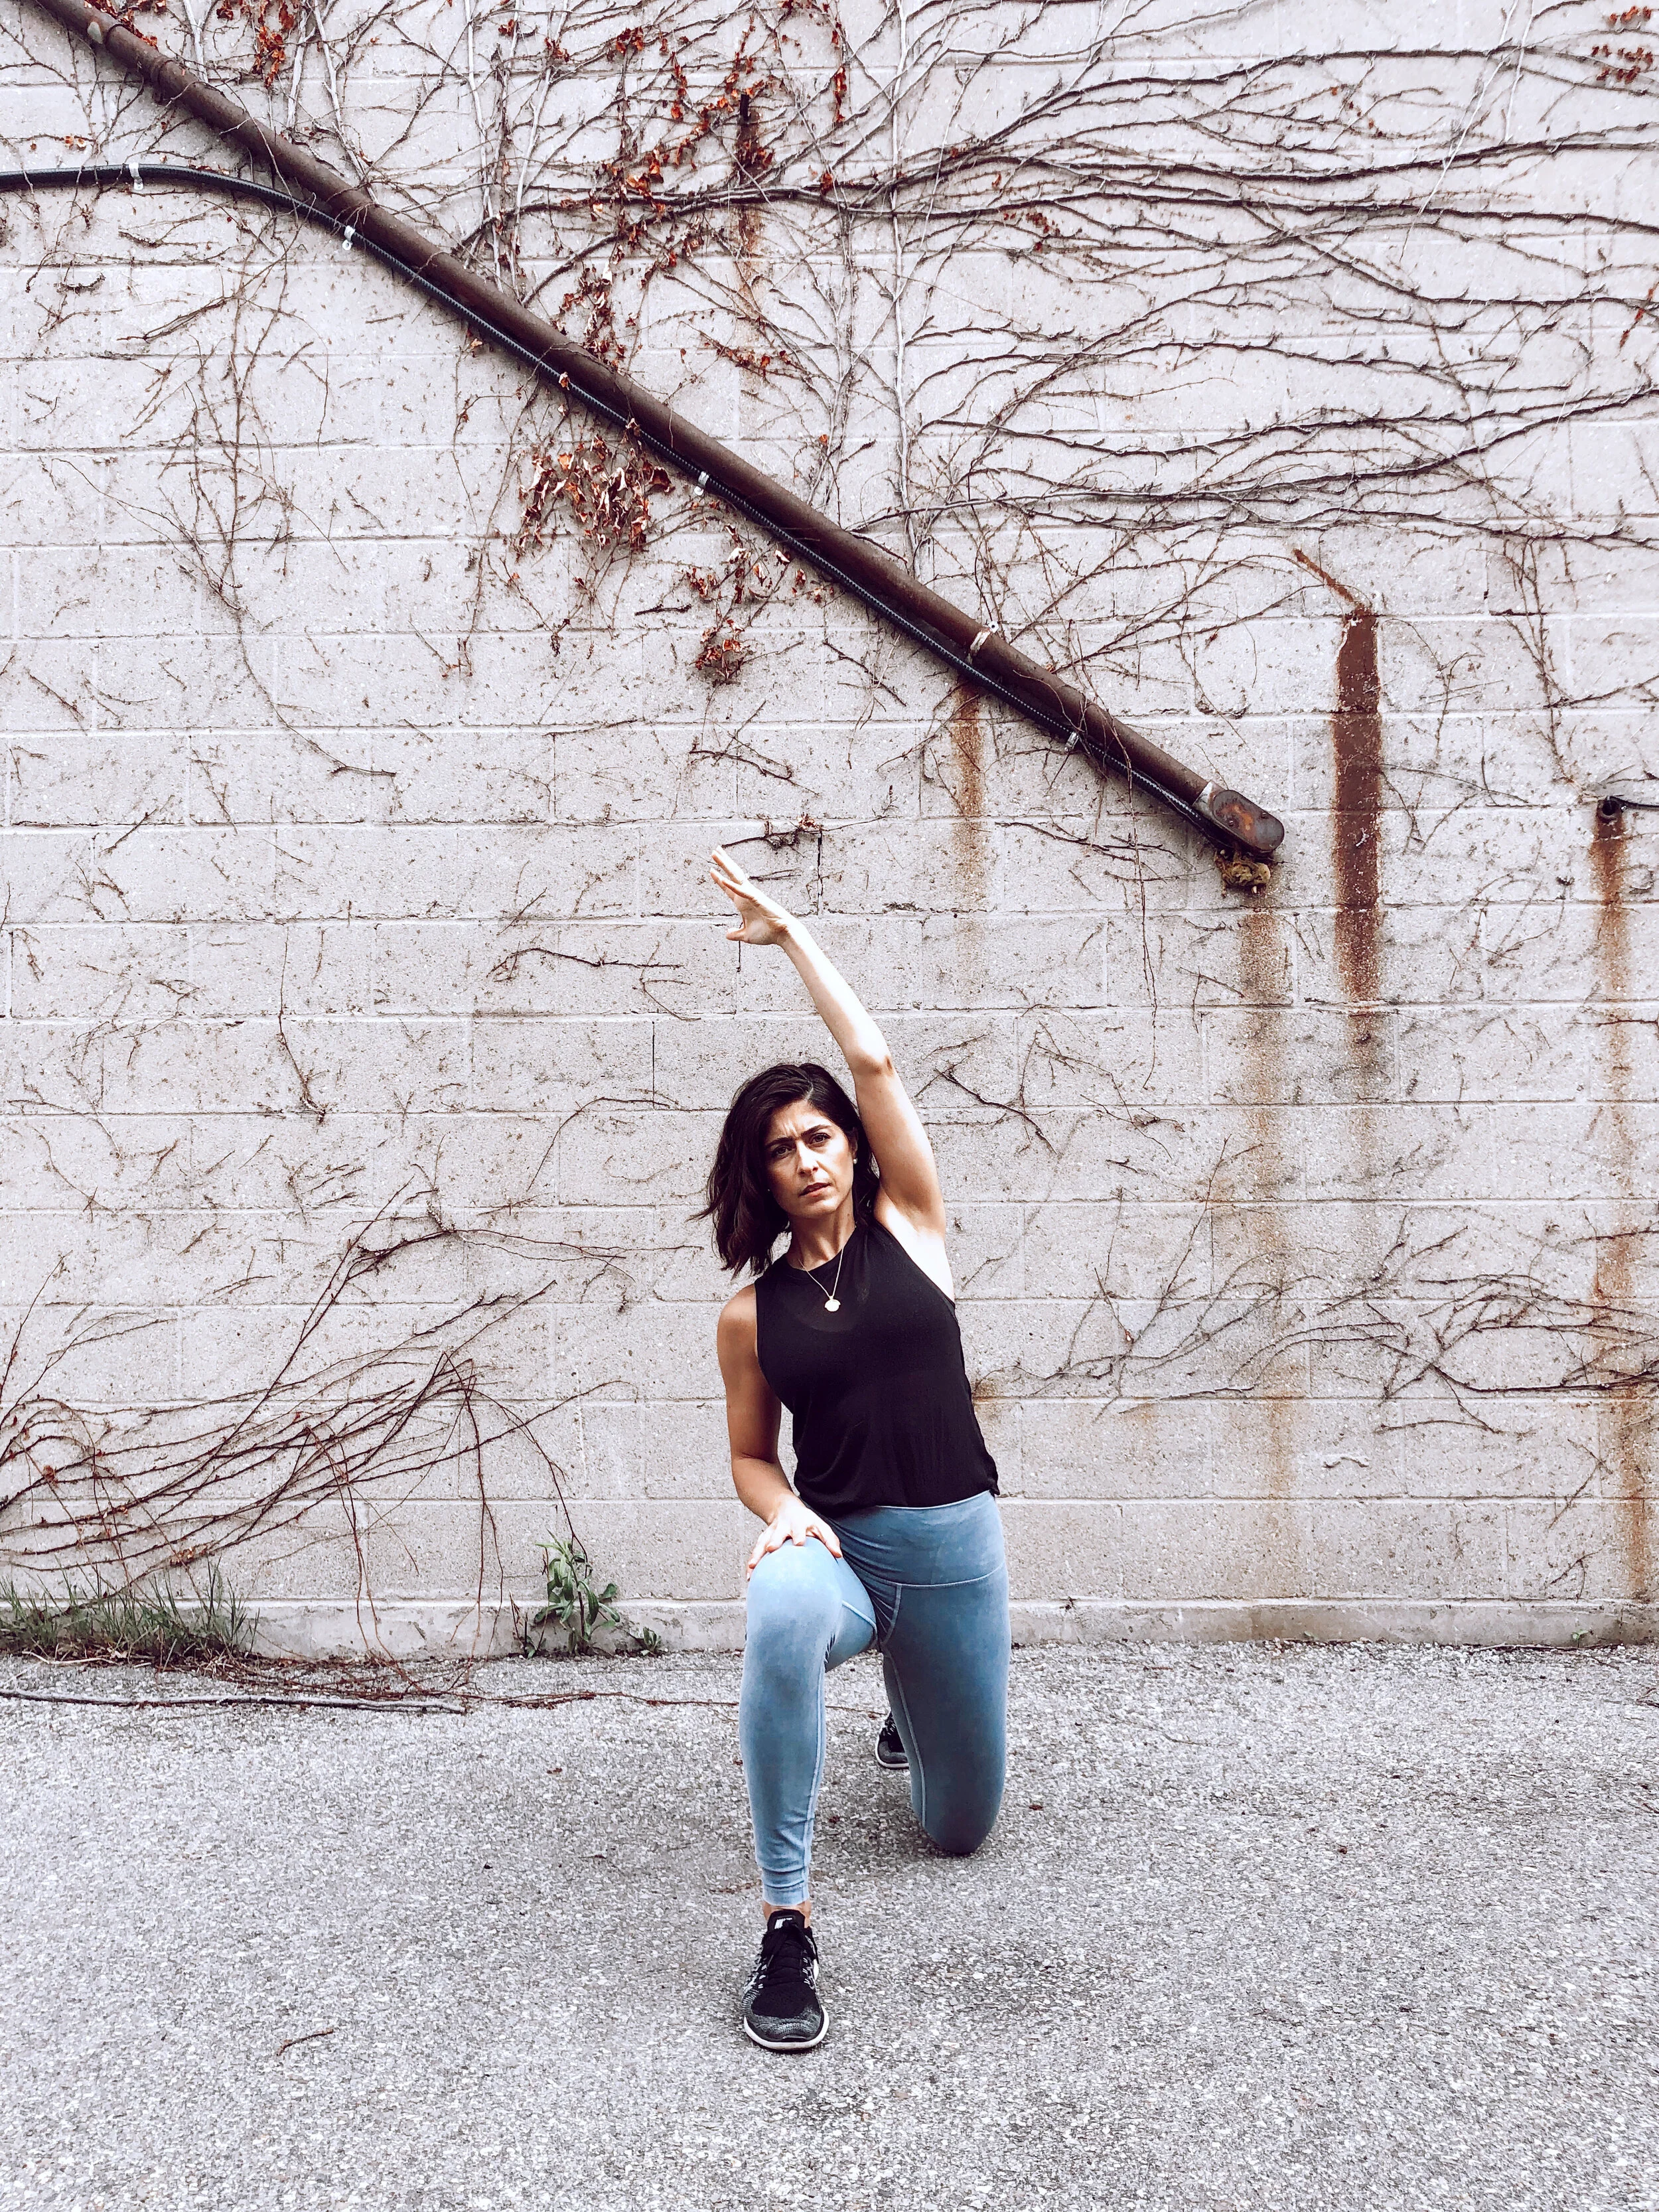
PICTURE TO THE LEFT IS WHAT YOU SHOULD NOT DO!
Notice the excessive lunge and
the tailbone untucked. You can see that the pelvis is tilted forward.
Once you start arching your back, you are NO LONGER stretching the hip flexor. In this position, the hip flexor is actually placed on slacK.
Keep your body straight with your arm reaching up to the sky and your knee driving into the earth. Feel the length and elongation with every breath.
Or side bend your upper body to the opposite side to feel a deep stretch into the side body.
Maintain your height without collapsing into the bent side.
Take a deep breath into the sensation.
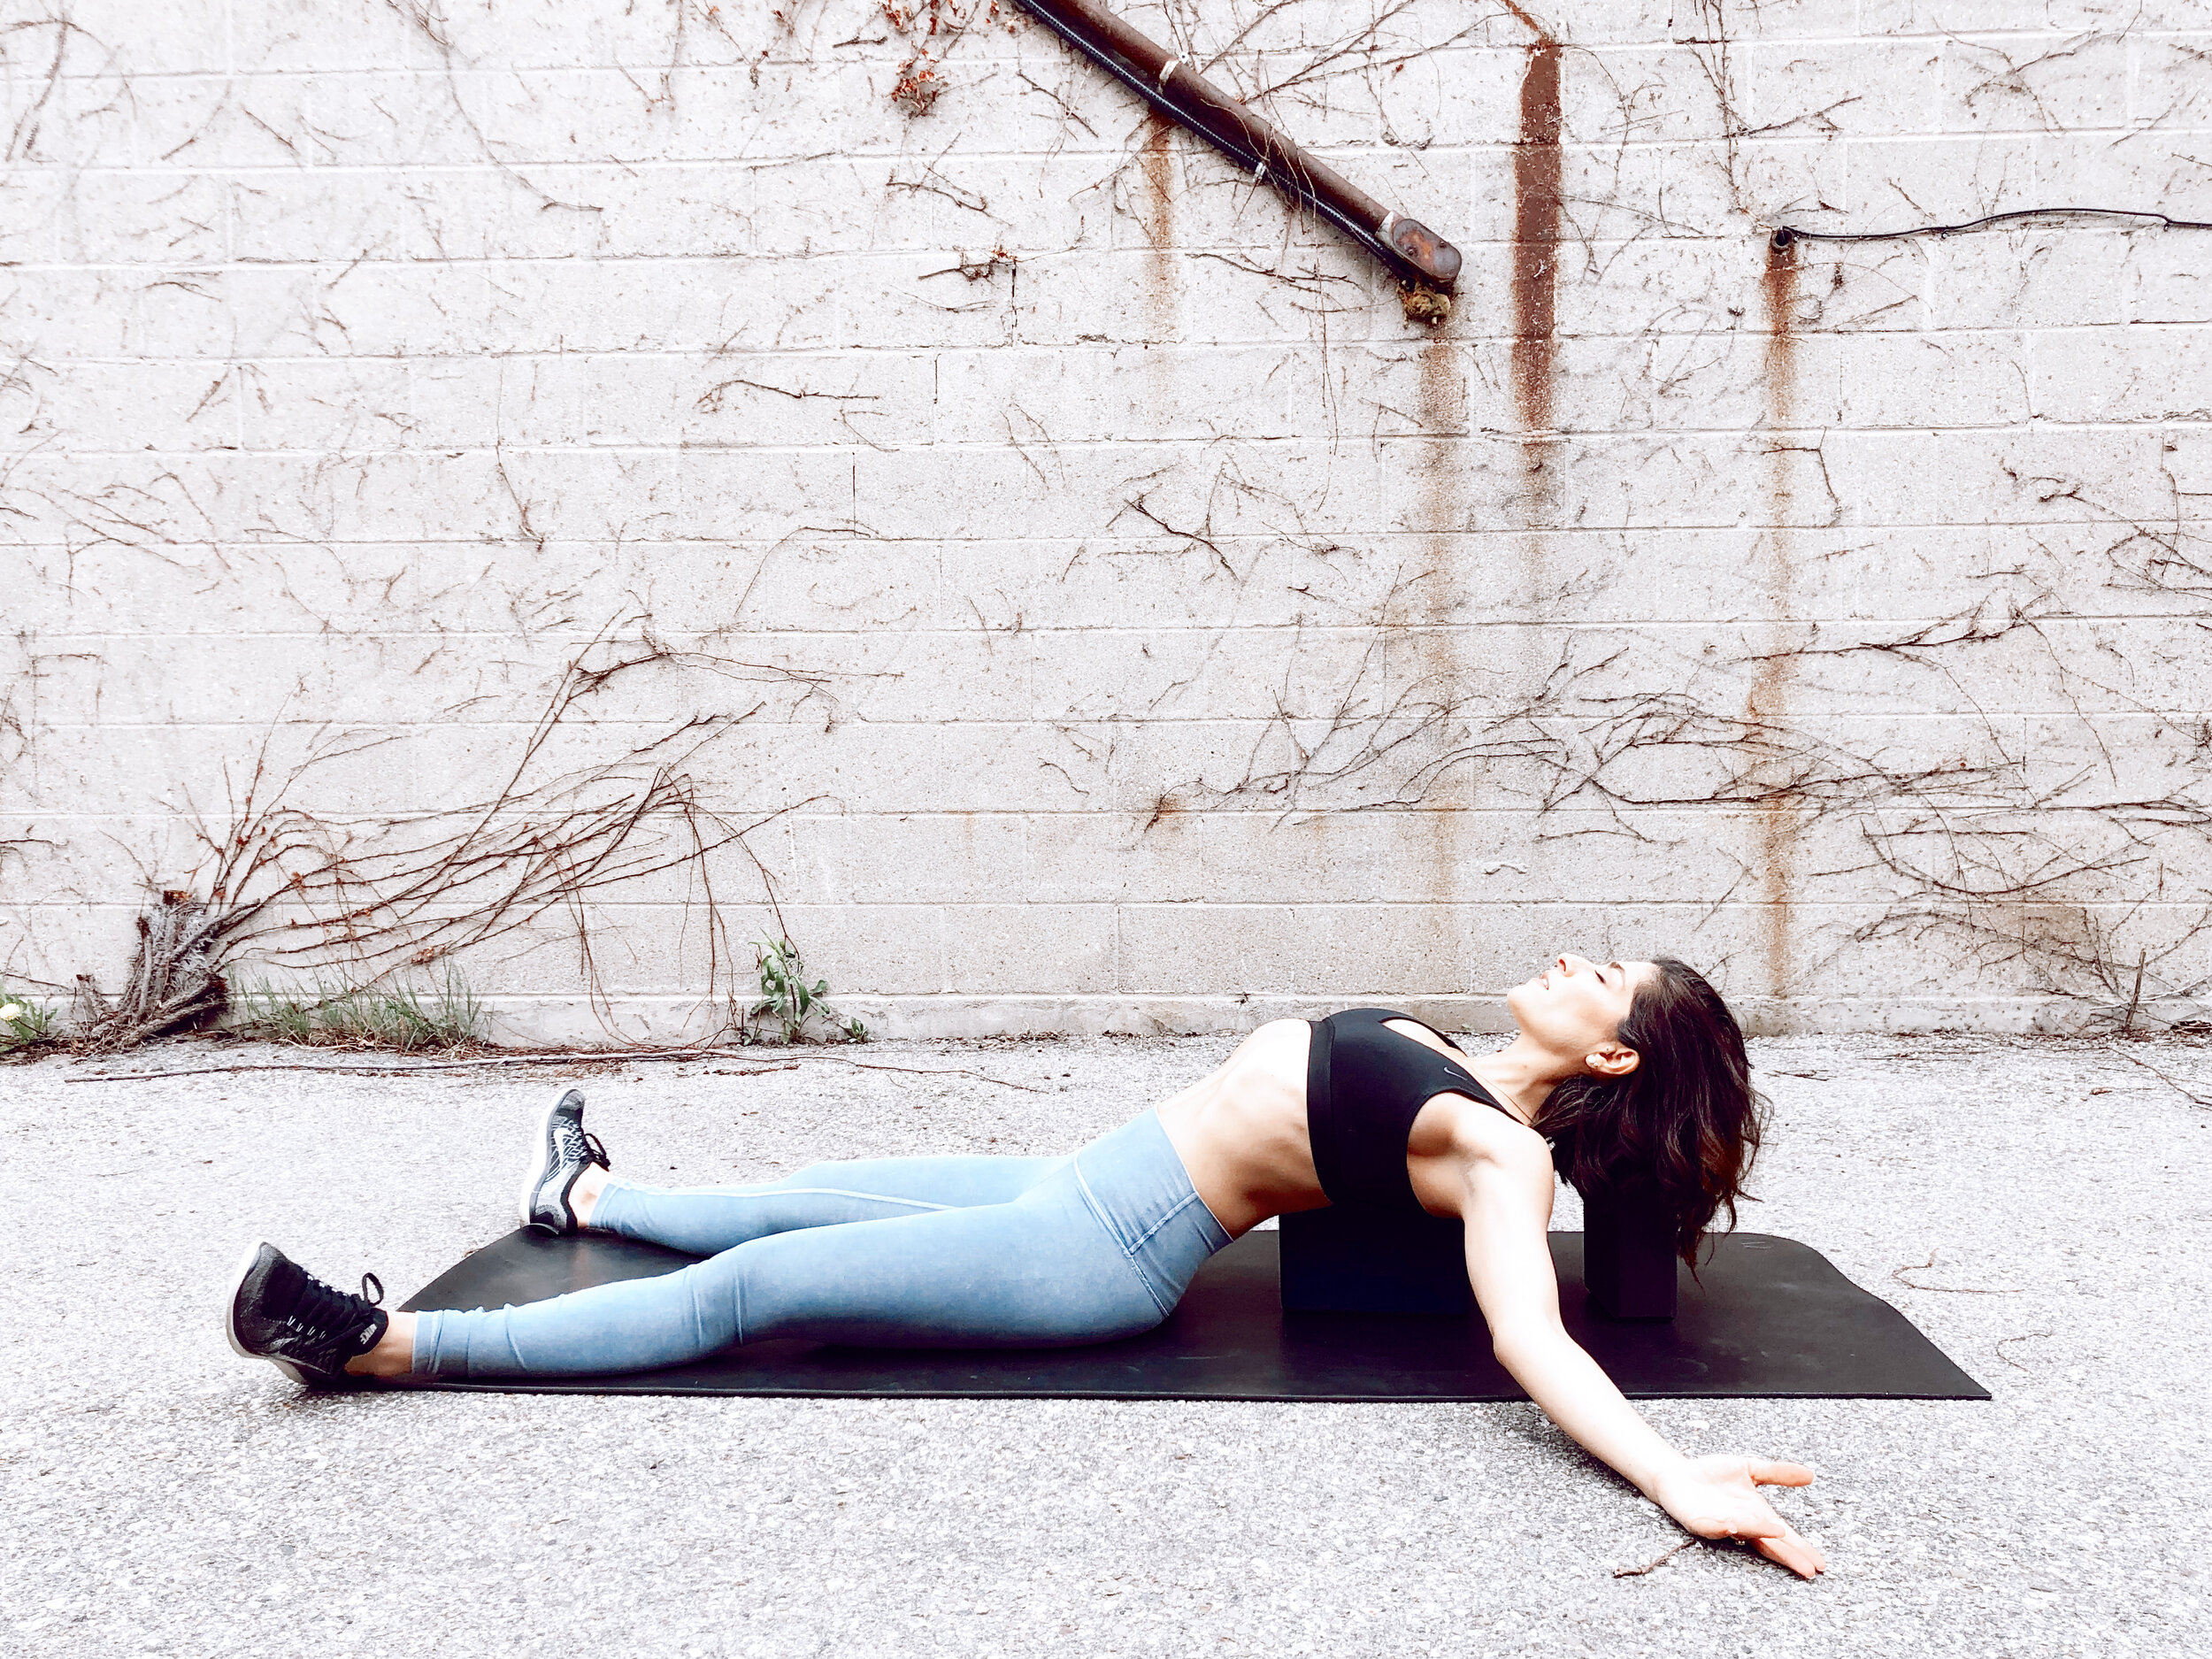
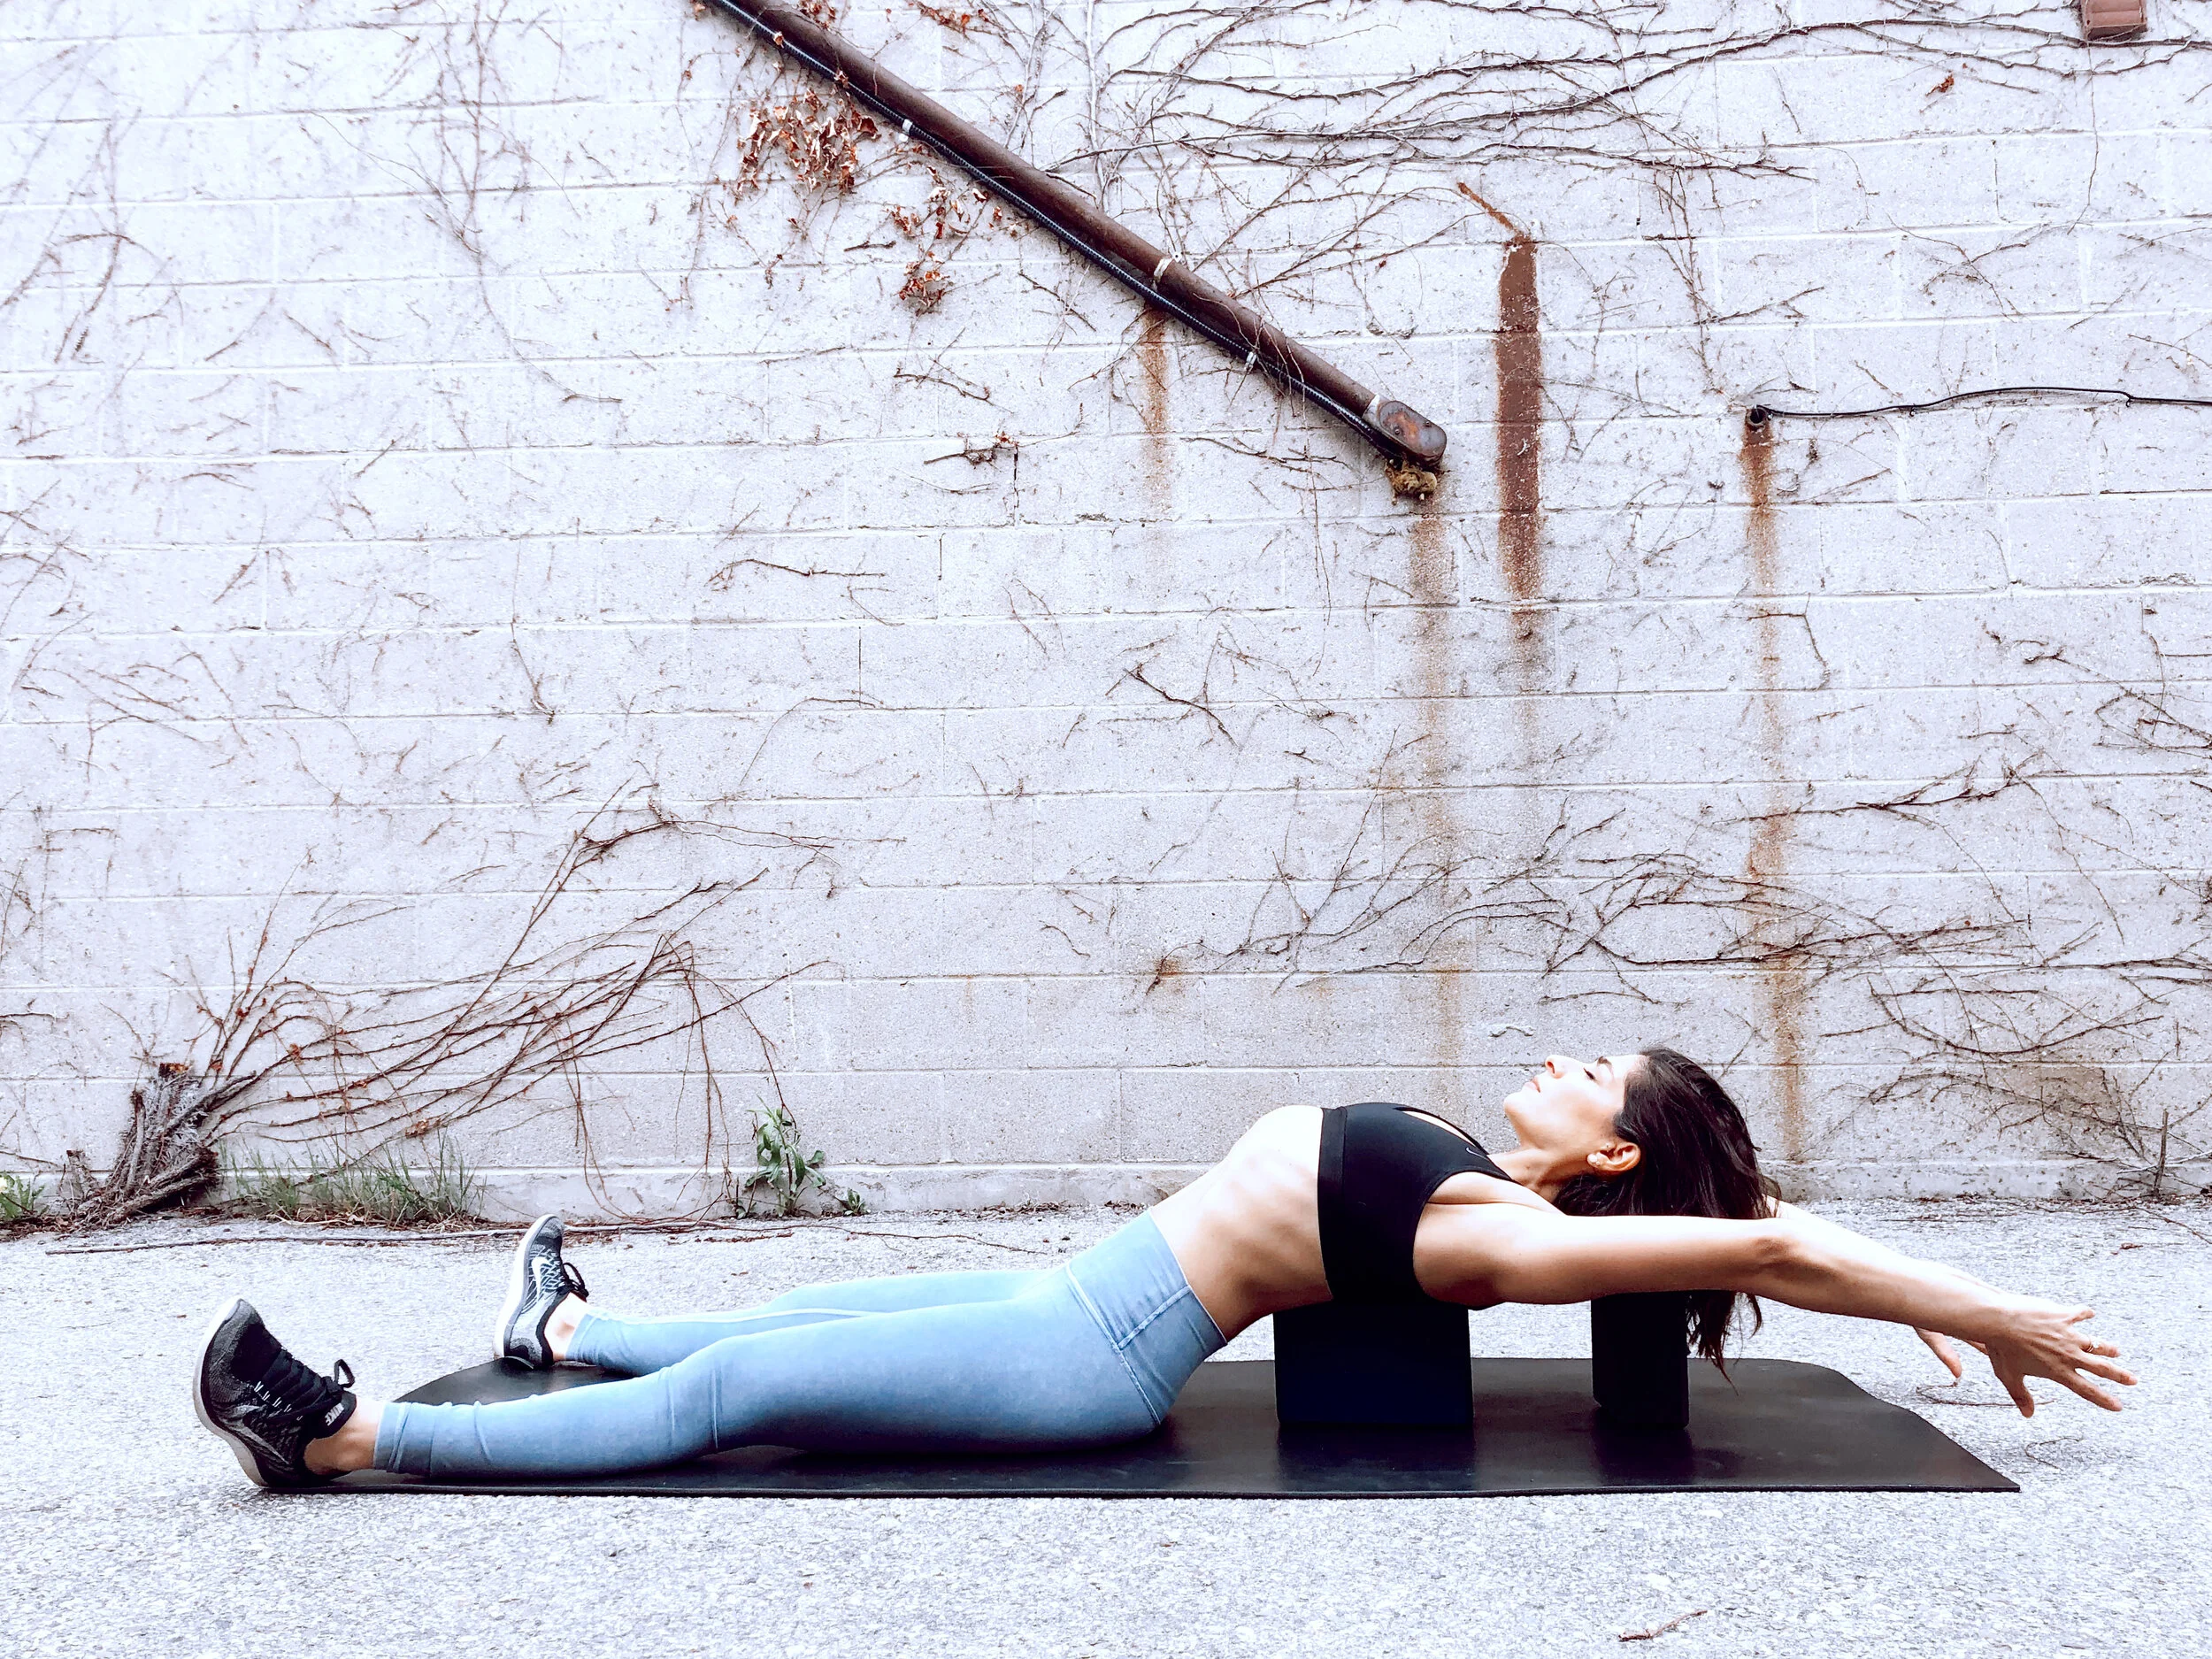
Exercise 4: Supported Fish Pose
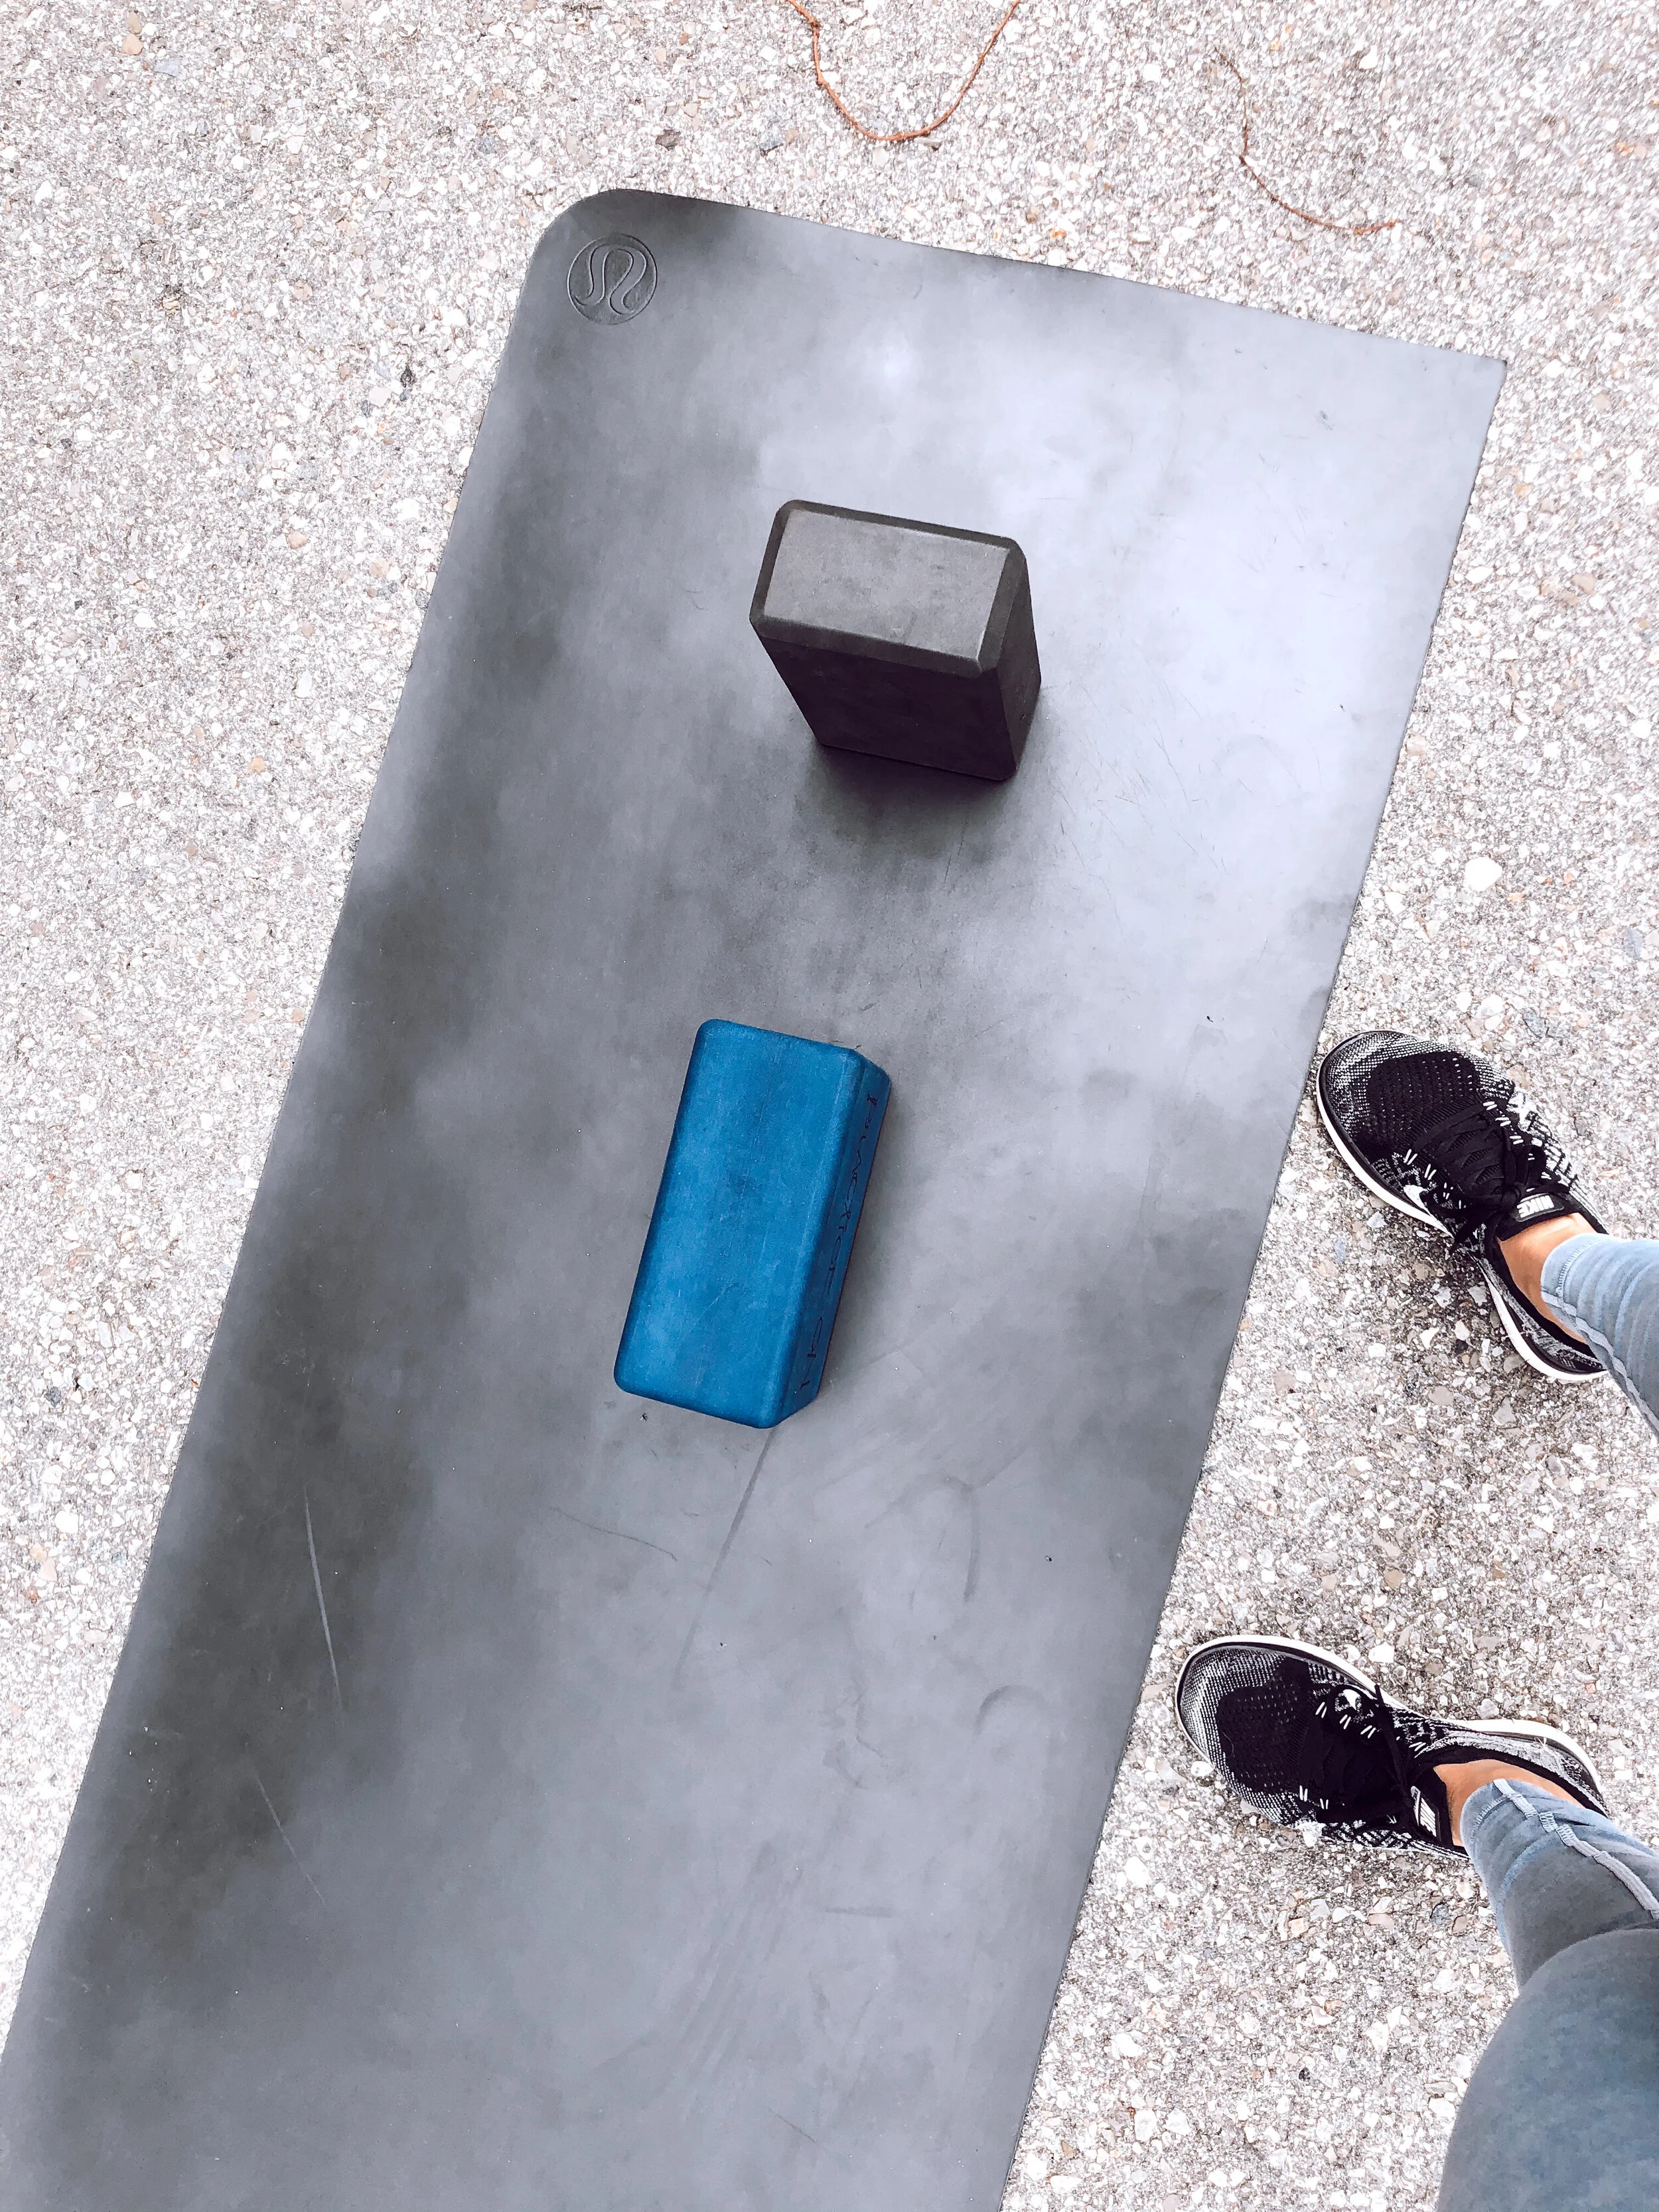
Equipment needed: 2 yoga blocks or 2-3 towels.
If you have yoga blocks place one block at its lowest or medium height lengthwise (blue block), depending on your flexibility. This block will go between your shoulder blades.
Place the other block at its tallest height (black block) perpendicular to the other one. This block will be supporting your head.
Lie on your back with your knees either bent or straight.
Make sure your head is not too flexed or extended. You need to be able to breathe with ease and swallow with no difficulty. Adjust your positioning accordingly.
Place your arms by your side or stretched out in a T shape (shown in picture).
Relax and melt into the blocks and breathe. Stay in that position for 5-10 minutes
No yoga blocks?
Fold 1-2 towels and place between the shoulder blades, then place another smaller towel behind the back of your head for support if needed. Using towels, will make this exercise less intense.
This is a great relaxation exercise to do at the end of the day for winding down.
You can also place your arms above your head to intensify the stretch.
Only do so if the flexibility is available.
There you have it! Sometimes we don’t have to reinvent the wheel, we just have to be consistent and make little adjustments to very common exercises.
Please be advised that these movements are some of my go-to exercises and may not be appropriate for everyone. A proper evaluation by a registered physiotherapist is ideal before starting any exercise program, especially if you are injured. Your physiotherapist will advise you on the most appropriate exercises, adjustments and progressions specific to your individual needs. But if you think you are ready to give these a try, go for it! Let me know how it goes :)
